
Appearance
Building Your First Workflow
Creating the Workflow
In the Object Browser, expand Workflows, right-click Master and select New Workflow. The New Workflow dialog opens:
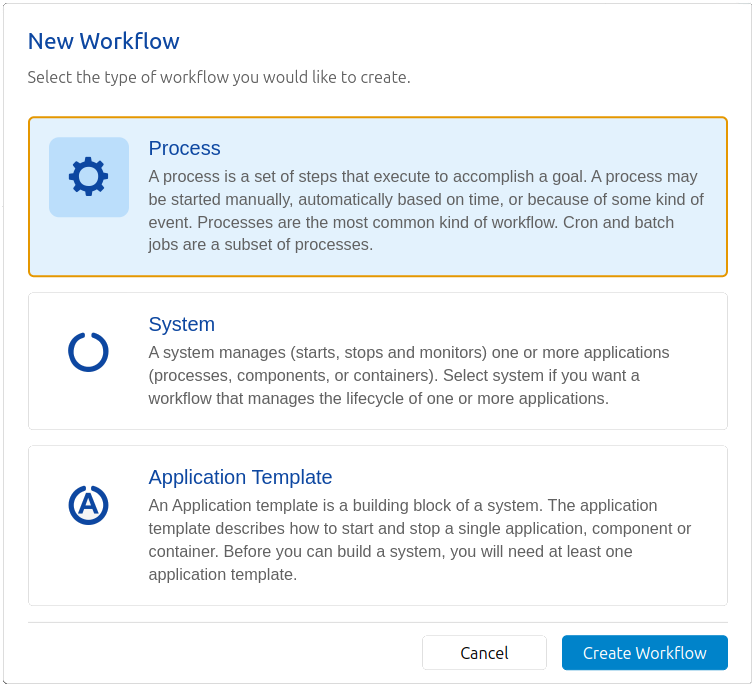
Select Process and press the Create Workflow button. This opens the workflow editor.
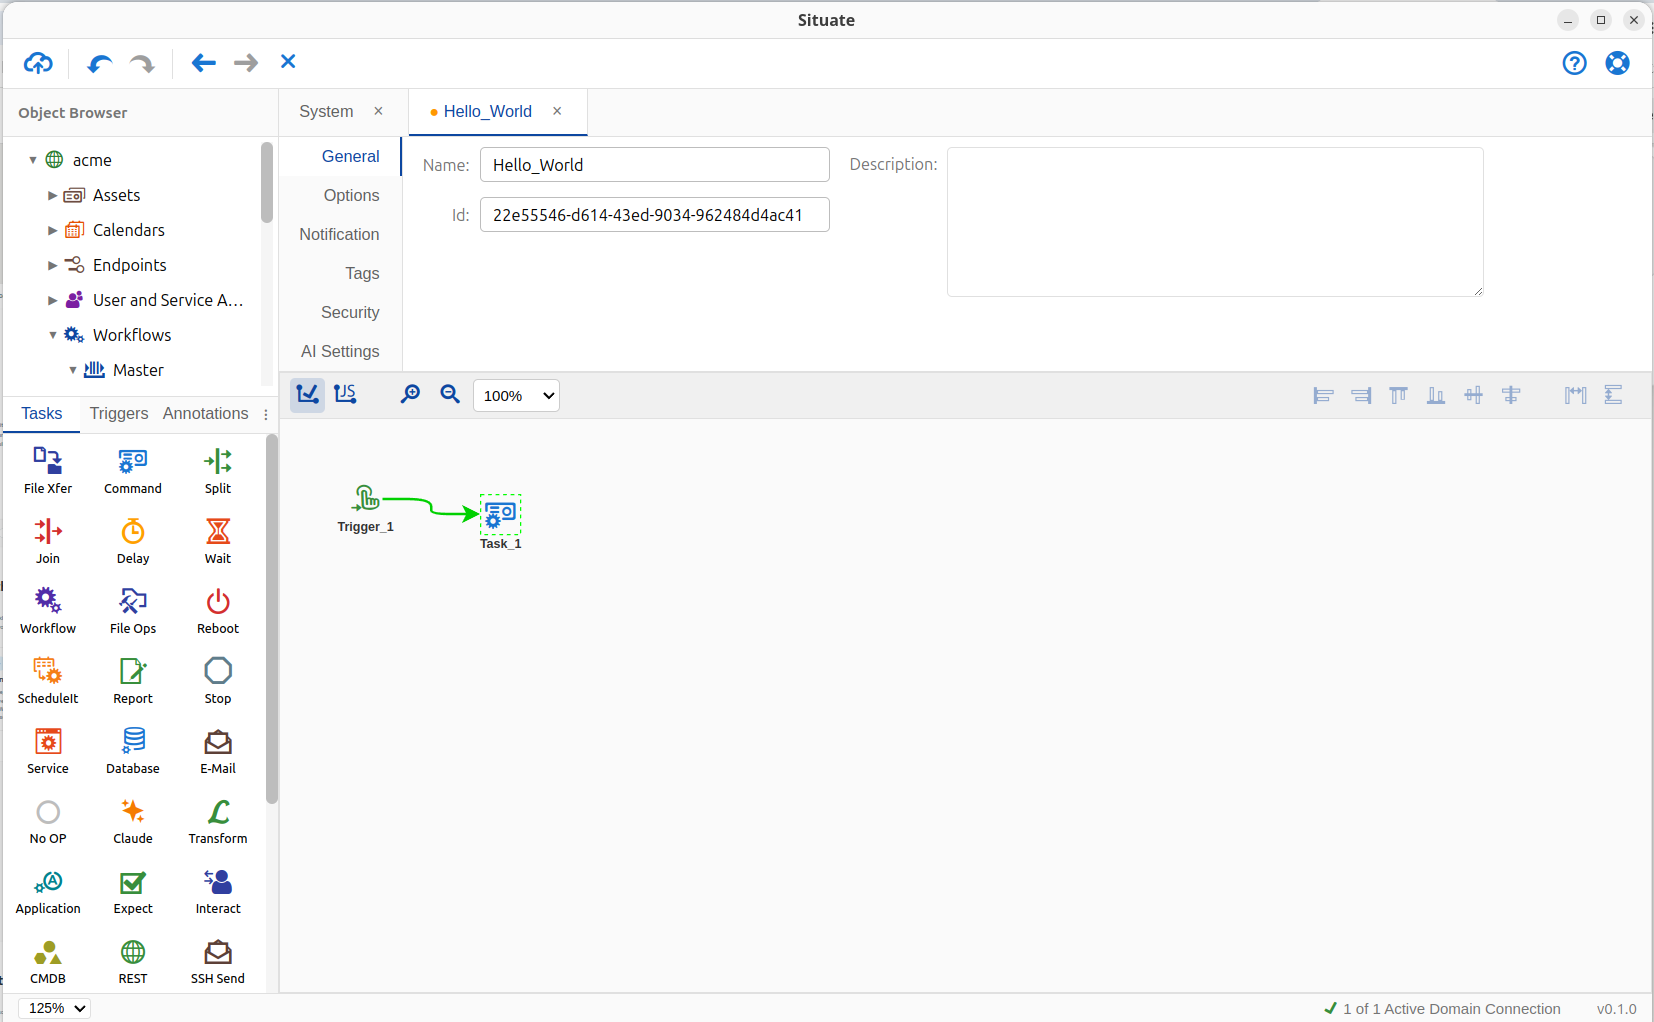
This is what our first workflow will look like:
Adding a Trigger and a Task
On the General tab, change the workflow's name to Hello_World.
In the palette (under the Object Browser), select the Triggers tab. Drag the first trigger, the Manual Trigger, into the workflow.
Next, select the Tasks tab. Drag the Command task (the second one) into the designer, to the right of your trigger.
Now connect them. Hover over the center of the trigger until a green box appears, then drag the mouse to the center of the task. A green arrow should connect the two.
A trigger is where a workflow starts; in this case, manually. When the workflow runs, it executes the trigger, follows the arrow and executes the task.
Configuring the Task
The last thing to do is configure the command task. Double-click it to open its configuration:
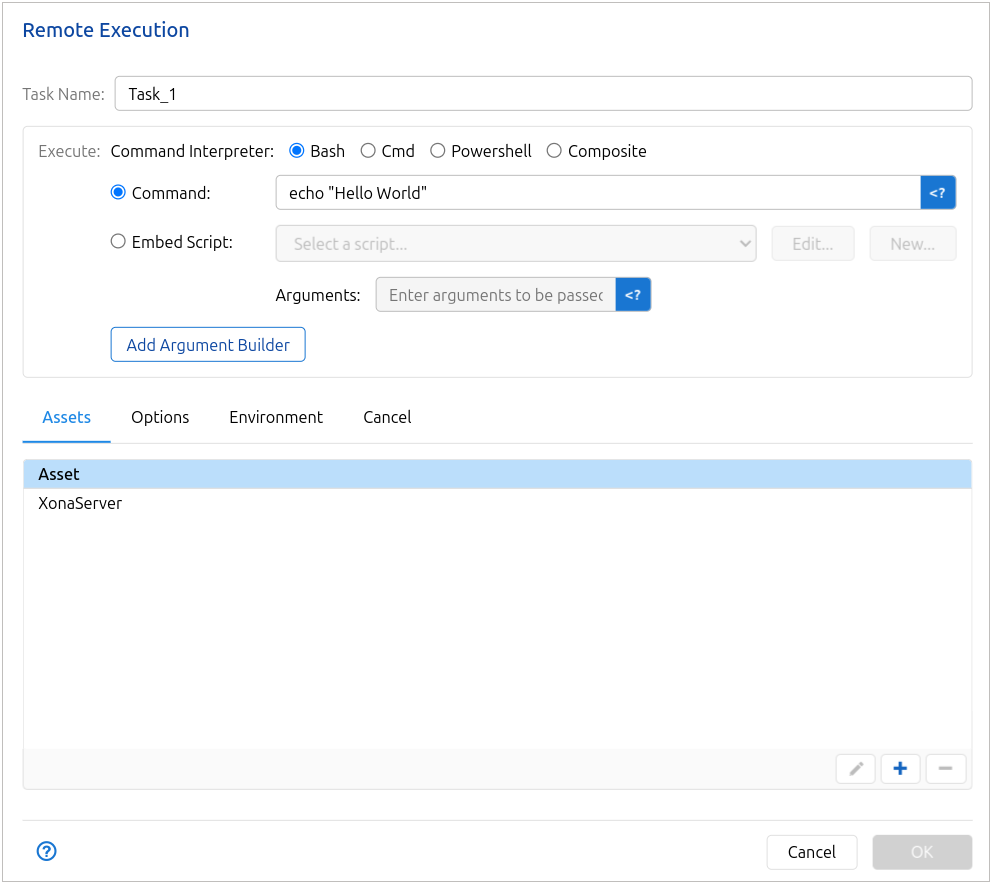
In the Command box, enter echo "Hello World". Then, at the bottom, press + and pick XonaServer. This runs the command on your Situate server.
Press OK. Then press the Submit button (the cloud with an up arrow) at the upper left of the toolbar. The workflow is now submitted to the system.