Appearance
Creating and Editing Workflows
To create a workflow, right-click on a workflow queue or group in the Object Browser where you want the workflow to go and select "New Workflow". You can also select "File", then "New" and "Workflow...".
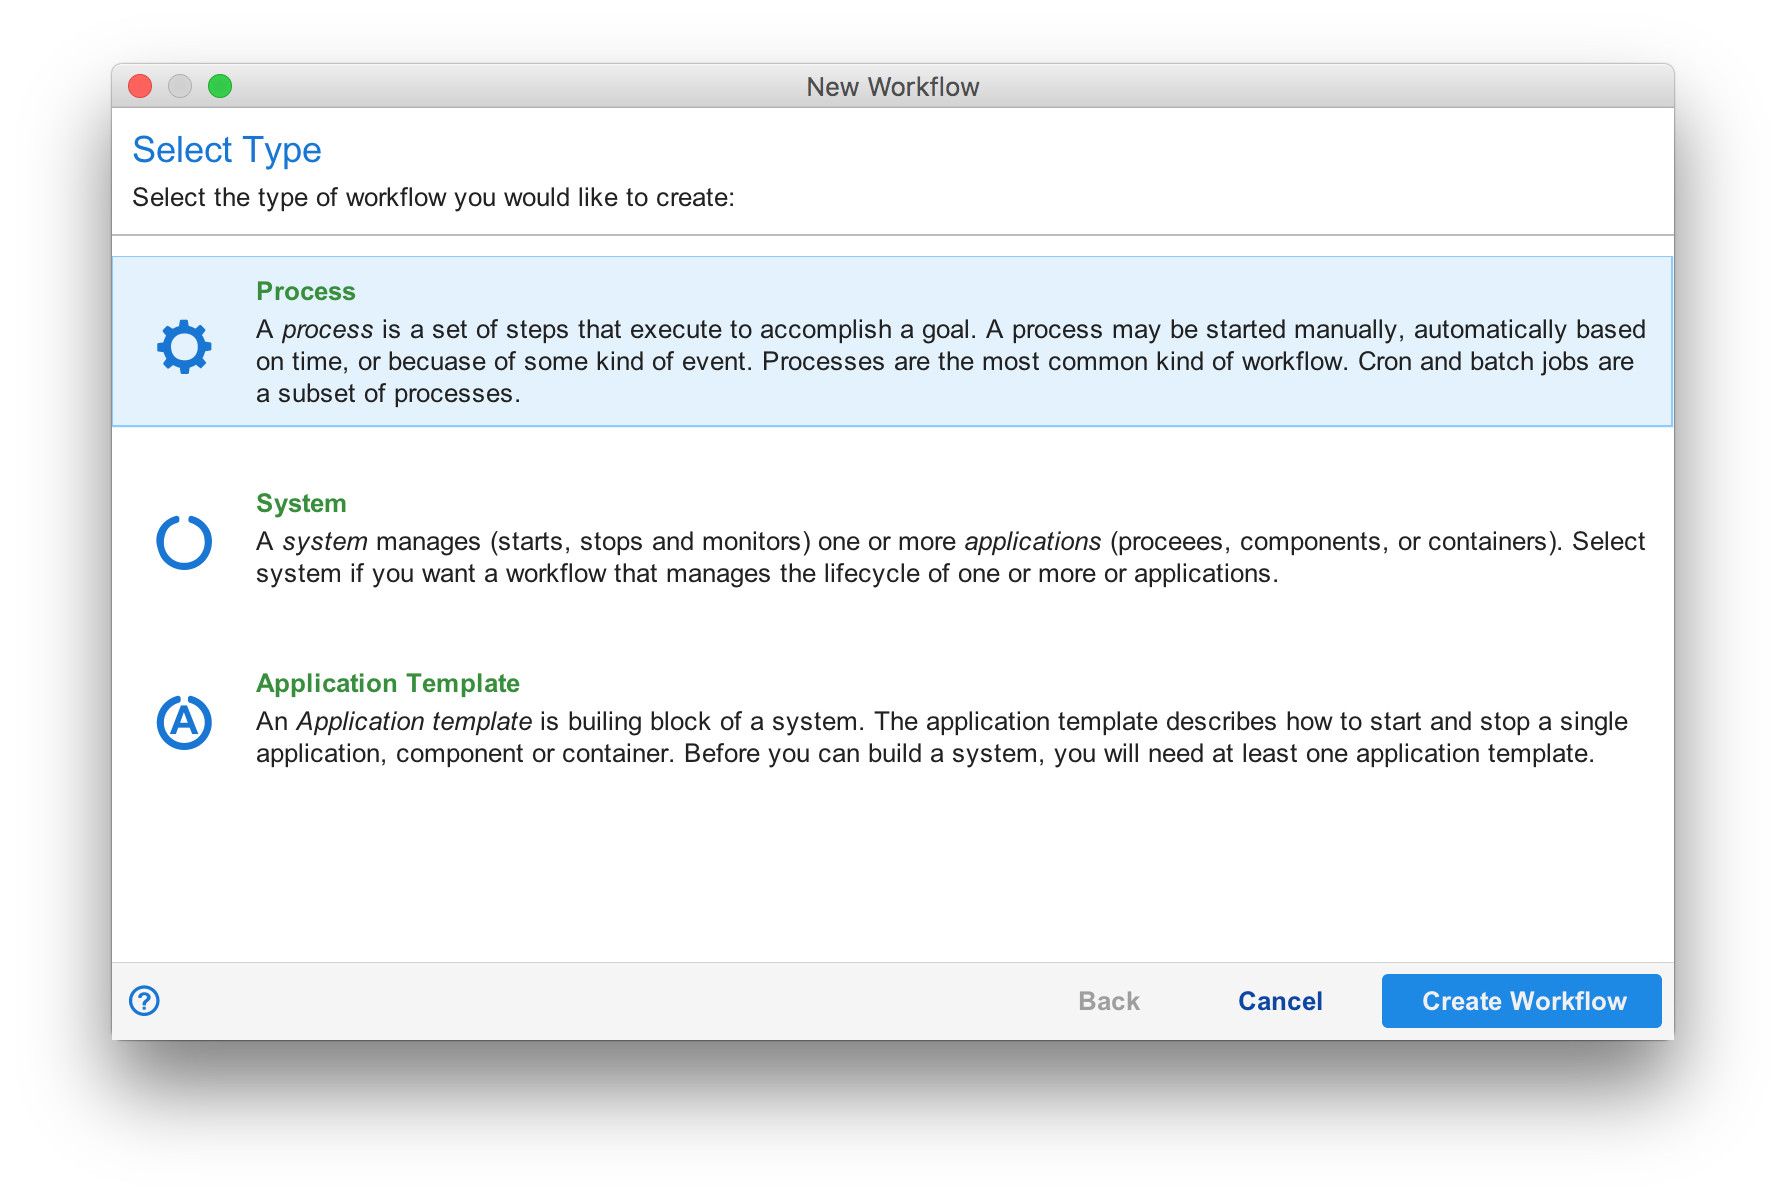
Next, select the type of workflow you want to create. The most common workflow type is "process". The other two types relate to systems and applications. They are discussed in the book Systems and Applications.
Once selected, the workflow designer is opened to an empty workflow.
The Workflow Designer
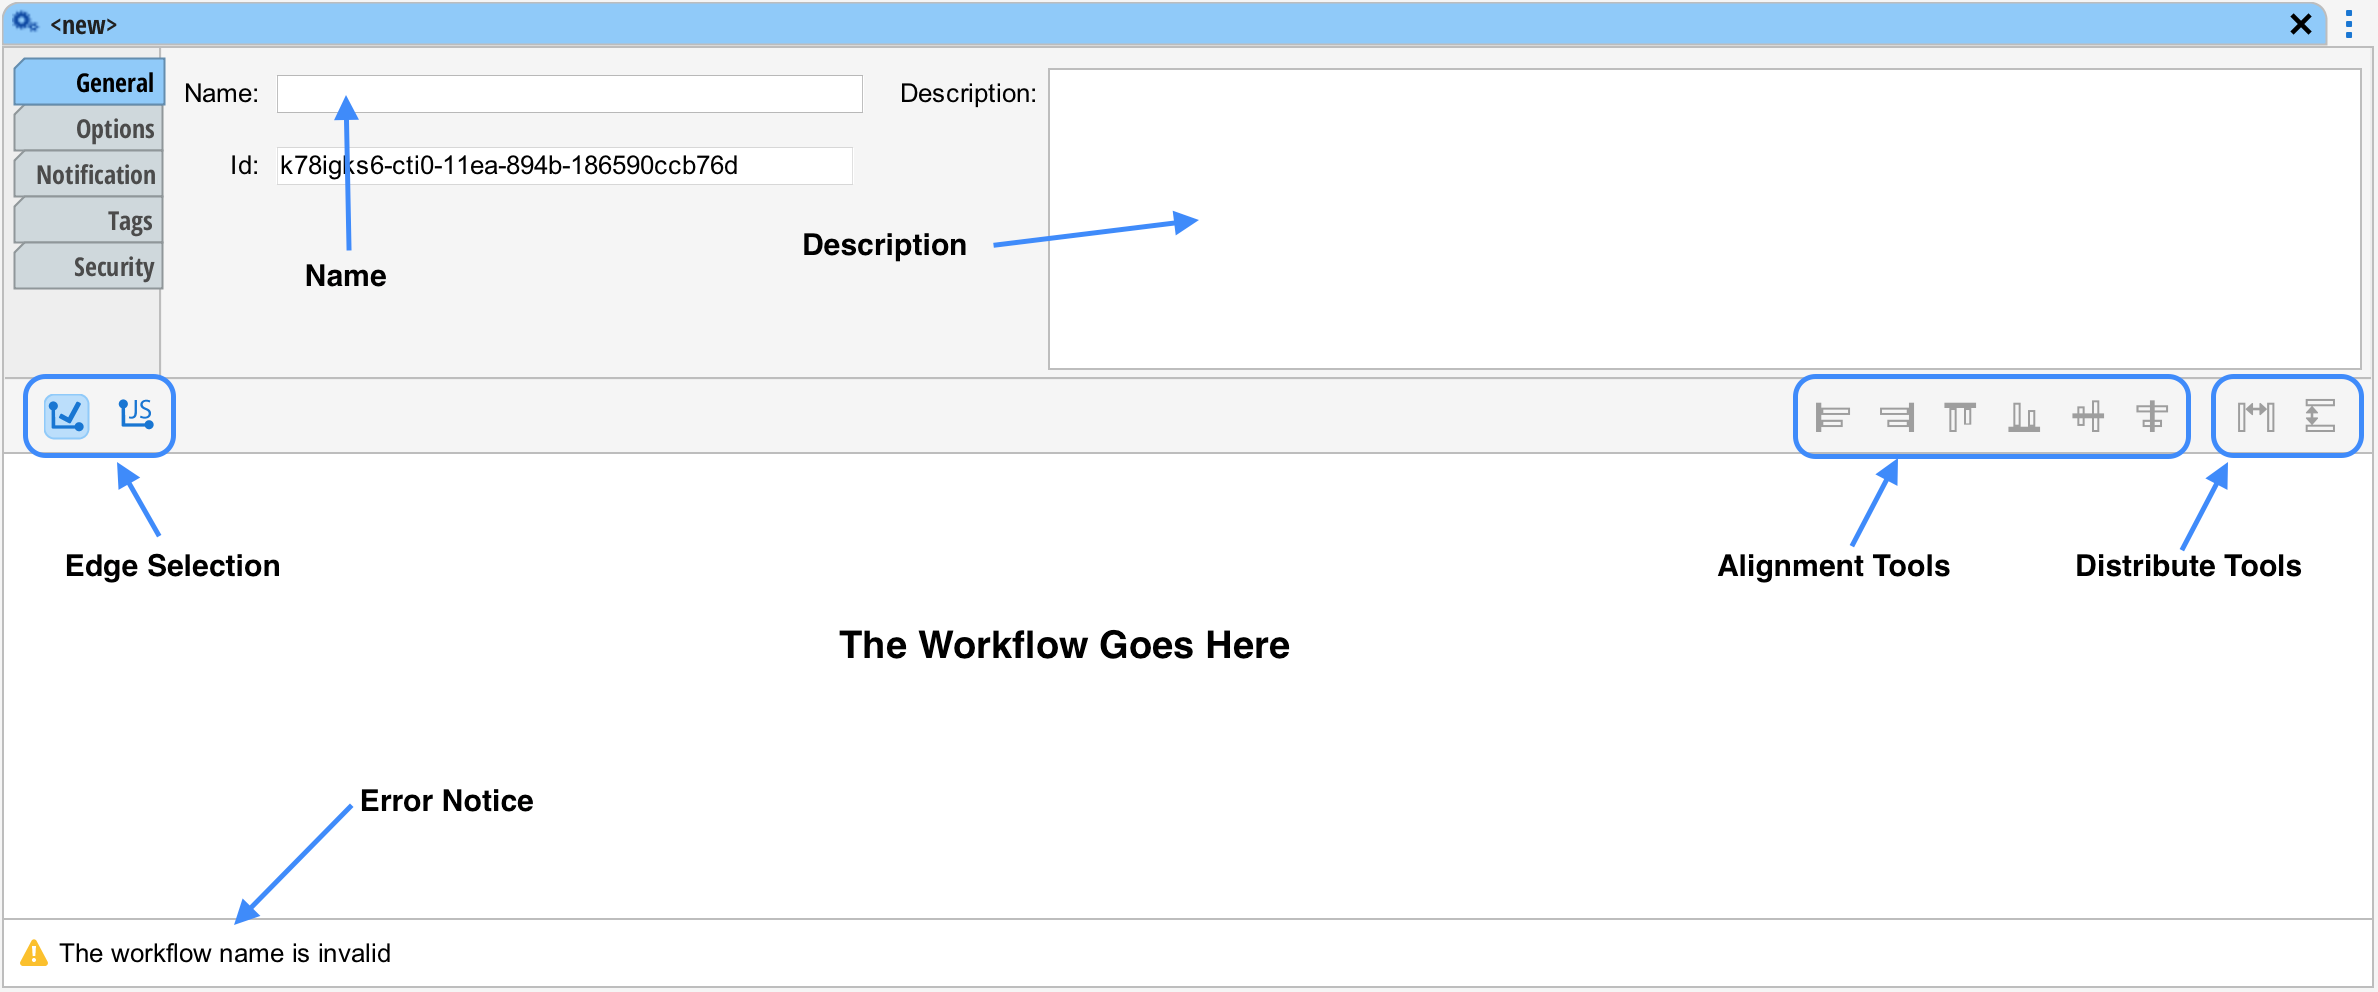
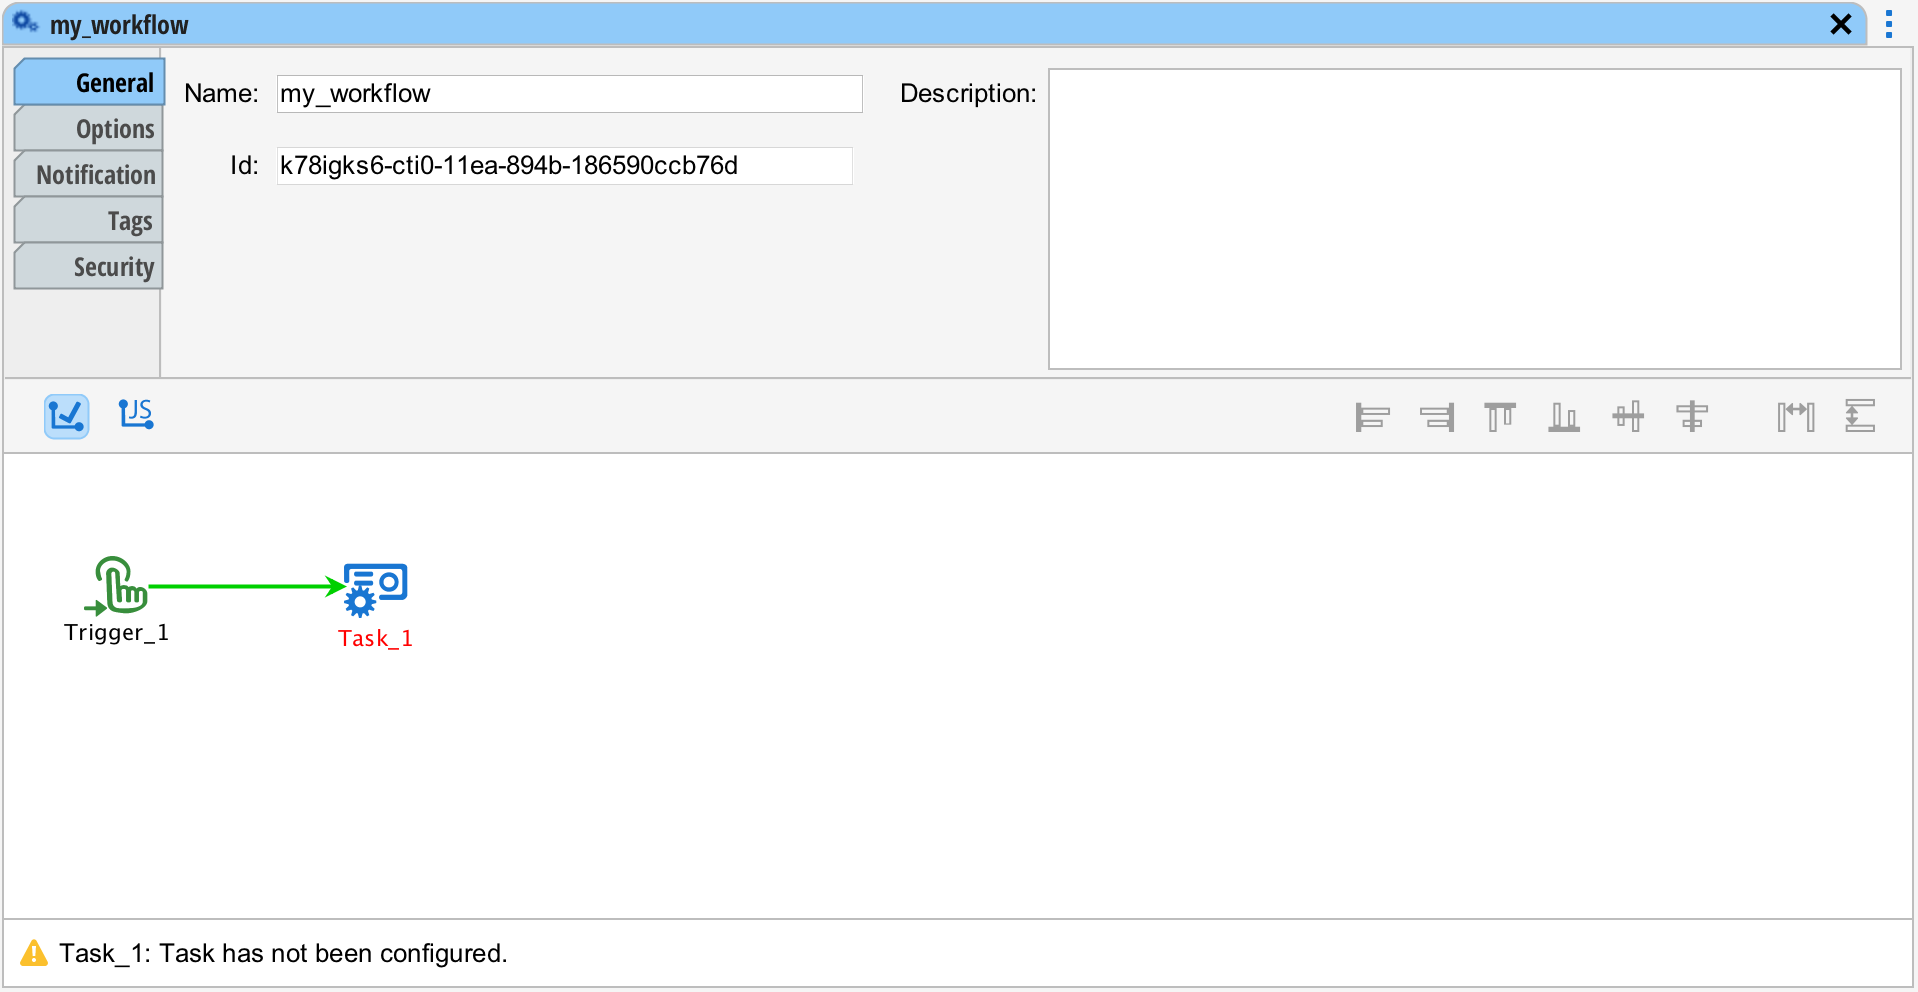
Name
When creating, the first thing you will want to do is give your new workflow a name and description. Names must not contain spaces or hyphens and is limited to legal characters for Javascript variable names. (The workflow's name can be used to reference it from code.)
Description
The description is important to document the workflow. Situate can also search the description using queries from the Queue View and via APIs.
The ID
Inside Situate, workflows are referenced by ID. The ID is shown on the general tab of the workflow designer.
Error Notice
At the bottom of the tab in the image above, there is an error: "The workflow name is invalid". If your workflow is invalid, the The error notice will describe why.
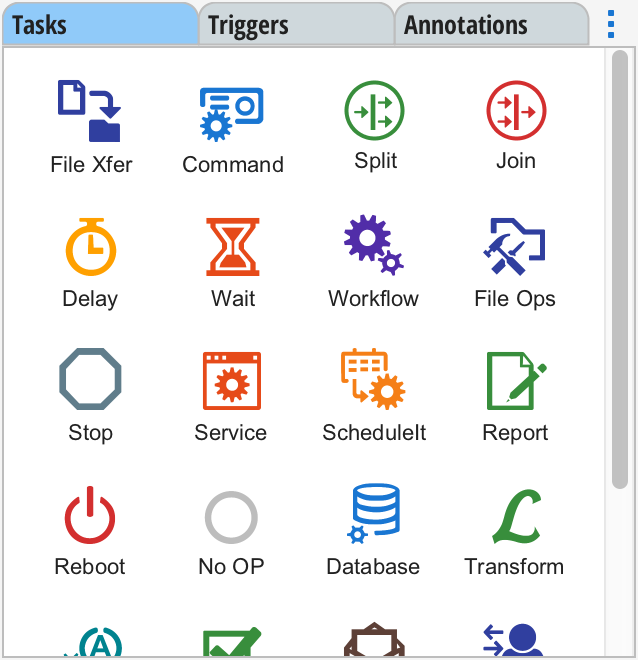
The Palette, Tasks, Triggers and Annotations
The center part is where the workflow goes. You add tasks, triggers and annotations to the workflow by dragging them from the palette which is on the left under the Object Browser.
The first step in creating a workflow is adding a trigger. Triggers start a workflow. One or more can be added. In fact, if you've filled in the workflow's name, the error area already contains an error that says: "A workflow must have at least one trigger".
Select the "Triggers" tab int the palette and drag the trigger of your choosing over into the workflow area.

In the example above, a manual trigger was dragged into the workflow. The manual trigger allows the workflow to be started manually by right clicking on the workflow from the Queue View and selecting "Execute..." and the trigger's name.
Next, we're going add a tasks. Tasks perform the work in a workflow. Select "Tasks" in the palette and drag a the task of your liking onto the workflow.
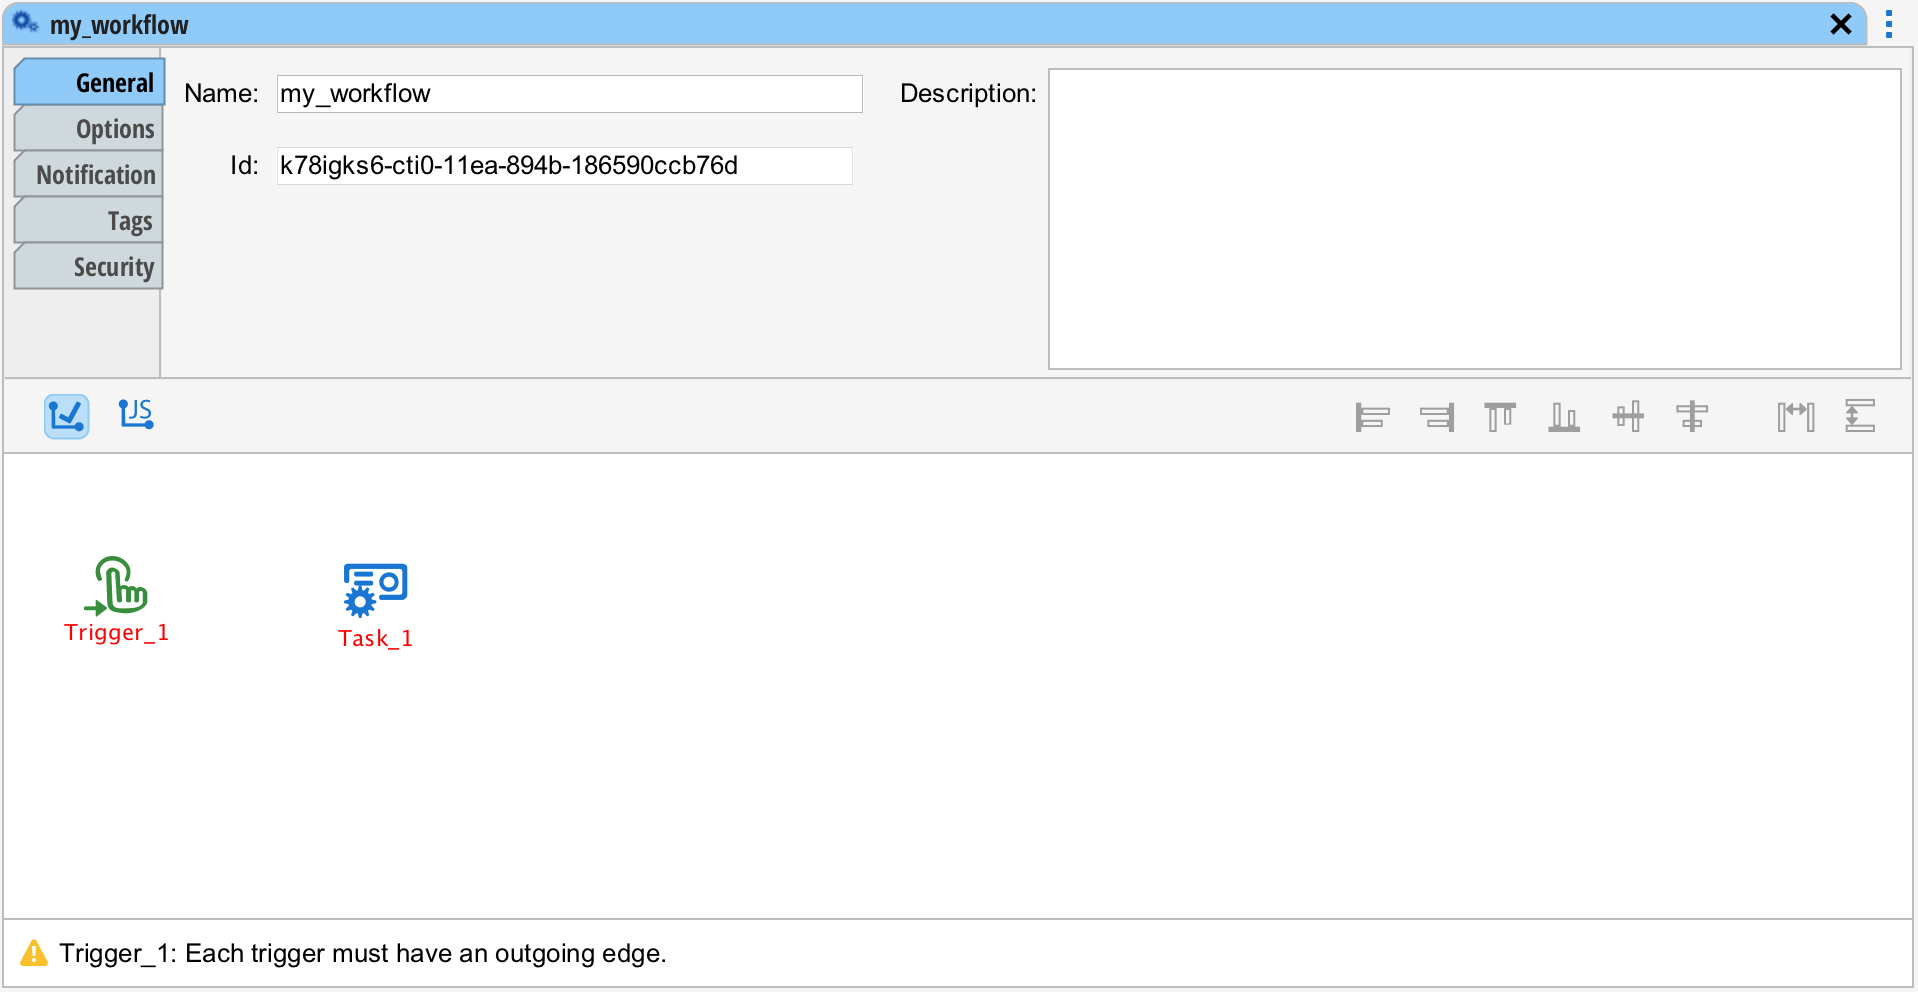
In this example, a remote execution task was dragged into the workflow.
To learn more about Tasks and Triggers, see Tasks and Triggers.
Palette View
The menu button () allows you to switch the palette between icon and list mode. List mode is more descriptive and easier for beginners whereas icon mode is more convenient for experienced users.
Edges
Edges connect workflow elements to together and establish the path of execution through the workflow. To connect the trigger to the task in the example above, hover the mouse over the trigger's center. A green box will appear. Then, press and hold the left mouse button. Drag the mouse to the center of the task. When the green box appears around the task, release the mouse. The task and trigger are now connected.
It's important to remember that the object where you initiate the connection will be the "from" end of the connection
A chain of connected workflow elements is called a sequence. To learn more, see Tasks, Tokens and Sequences.
Basic vs Expression Edge
There are two kinds of edges: basic and expression. The basic edge manages control flow based on the success, failure or completion of the task before it. The expression edge manages control flow based on small pieces of Javascript code such as customer == 'acme'. The kind of edge you get when you get when you connect edges determined by the edge selection in the designer.
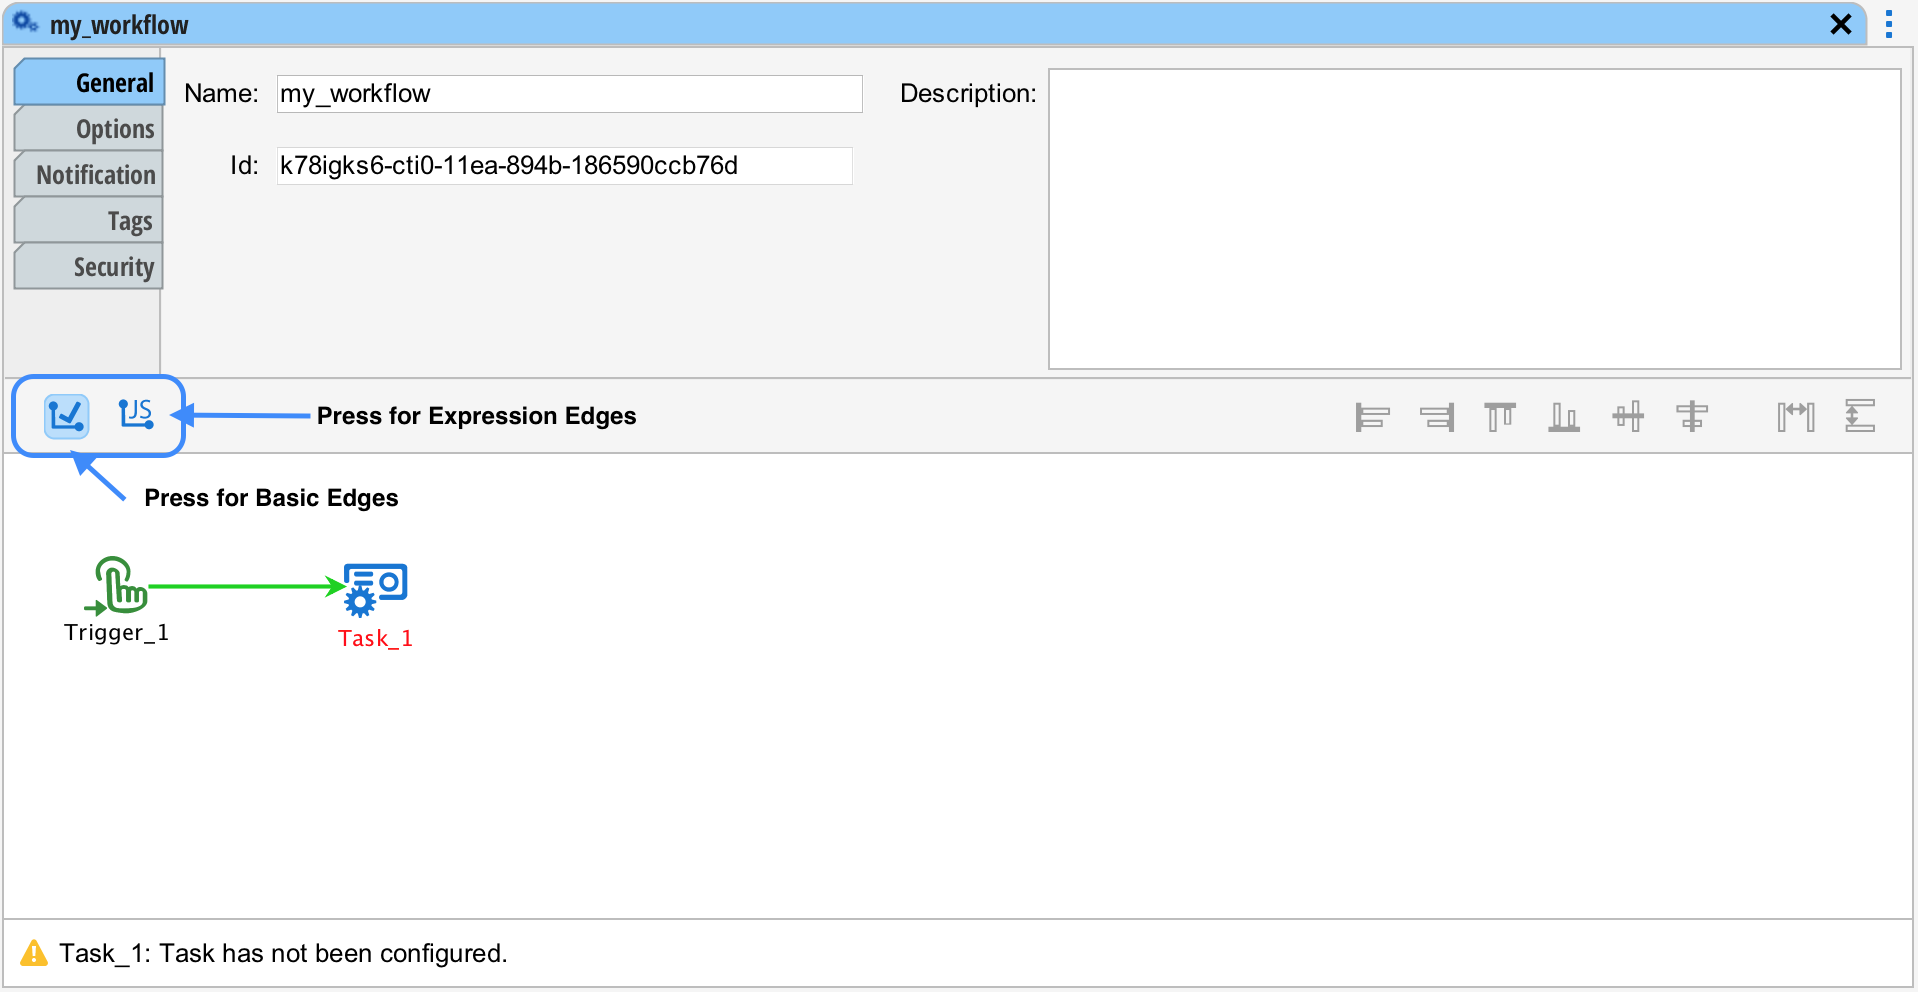
To learn more about Edges, see Basic Edge and Expression Edge.
Configuring Objects
Each trigger, task and annotation needs to be configured. You can do this by double clicking on the object or by right-click and selecting "Configure".
The configuration settings are different for each object. Therefore the configuration for each object is discussed on the object catalog.
Annotations
Annotations are non-functional elements that serve to document the workflow. Annotations can be added to the workflow by selecting the "Annotations" tab in the palette and dragging the desired annotation onto the workflow designer. Annotations are configured like any other task or trigger.
Arrow Annotations
Arrows can be drawn between annotations and tasks or triggers. This done the same way you connect tasks and/or triggers by hovering over the object until a green box appears and then dragging the mouse to the target object.
Arrows to/from annotations are straight and dashed. The dashed line indicates that the arrow does nothing with regard to process flow within the workflow.
Groups
In Situate groups are functional. Select one or more tasks, then right-click to select "Group ..." and then the kind of group you want to create. To read more about groups, see Groups.
Refiners
Refiners can be attached to any task that produces output. Refiners read the output of the task and further process it. For example, if you have a task that produces .CSV output or JSON perhaps, a refiner can read that file and assign it to a variable for subsequent tasks to process.
You can read more about refiners at Refiners.
Align and Distribute
The align and distribute tools help you make pretty workflows. To use these features, you must select two or more tasks or triggers, then press the button.
| Aligns all selected object on their left edges. | |
|---|---|
| Aligns all selected object on their right edges. | |
| Aligns all selected object on their top edges. | |
| Aligns all selected object on their bottom edges. | |
| Aligns all selected object on their vertical centers. | |
| Aligns all selected object on their horizontal centers. | |
| Spaces each element equally along the horizontal axis between the leftmost and rightmost object. | |
| Spaces each element equally along the vertical axis between the topmost and bottommost object. |
Submit
When you have completed creating or editing your workflow, press the submit button. Once pressed, Situate will transmit your workflow to the server for validation and submission. If successful, the editor will close. If validation fails, a "Validation Errors" window will appear in the Output Area that lists all the problems that must be fixed before Situate will allow your workflow to be submitted.